
Classes
A class is a reusable description that groups related sections over time. Students do not enroll in a class directly—they enroll in a section. Creating a class first gives you a stable place to attach sections season after season, which keeps year-over-year reporting and comparisons consistent.
Class Details
| Field | Required | Details |
|---|---|---|
| Banner Image | No | Upload or drag and drop an image for the class. Maximum size: 8MB. |
| Status | Yes | Defaults to Active. • Active — available when creating sections • Archived — hidden from day-to-day use, kept for history |
| Name | Yes | Use a clear, durable name (for example, 1st Grade Ballet or Advanced Jazz). Use names that still make sense next year. |
| Description | No | Short description of the class displayed on the registration page. |
| Minimum age | No | Youngest age the class is intended for. Leave blank if there is no minimum. |
| Maximum age | No | Oldest age the class is intended for. Leave blank if there is no maximum. If both ages are blank, the class list shows All ages. |
| Grades | No | Multi-select list of grade levels the class covers. Typical options: Pre-School, Kindergarten, 1st–12th Grade, and Adult. Select every grade that applies (for example, both 1st and 2nd Grade for a combined level). |
| Tags | No | Organize classes for filtering and display (for example, Ballet or Hip Hop). 1. Select a tag category 2. Choose tags within that category Categories are configured under organization setup. |
| Custom fields | Varies | Organization-specific fields. Fill these in as needed for your studio. |
Create a New Class
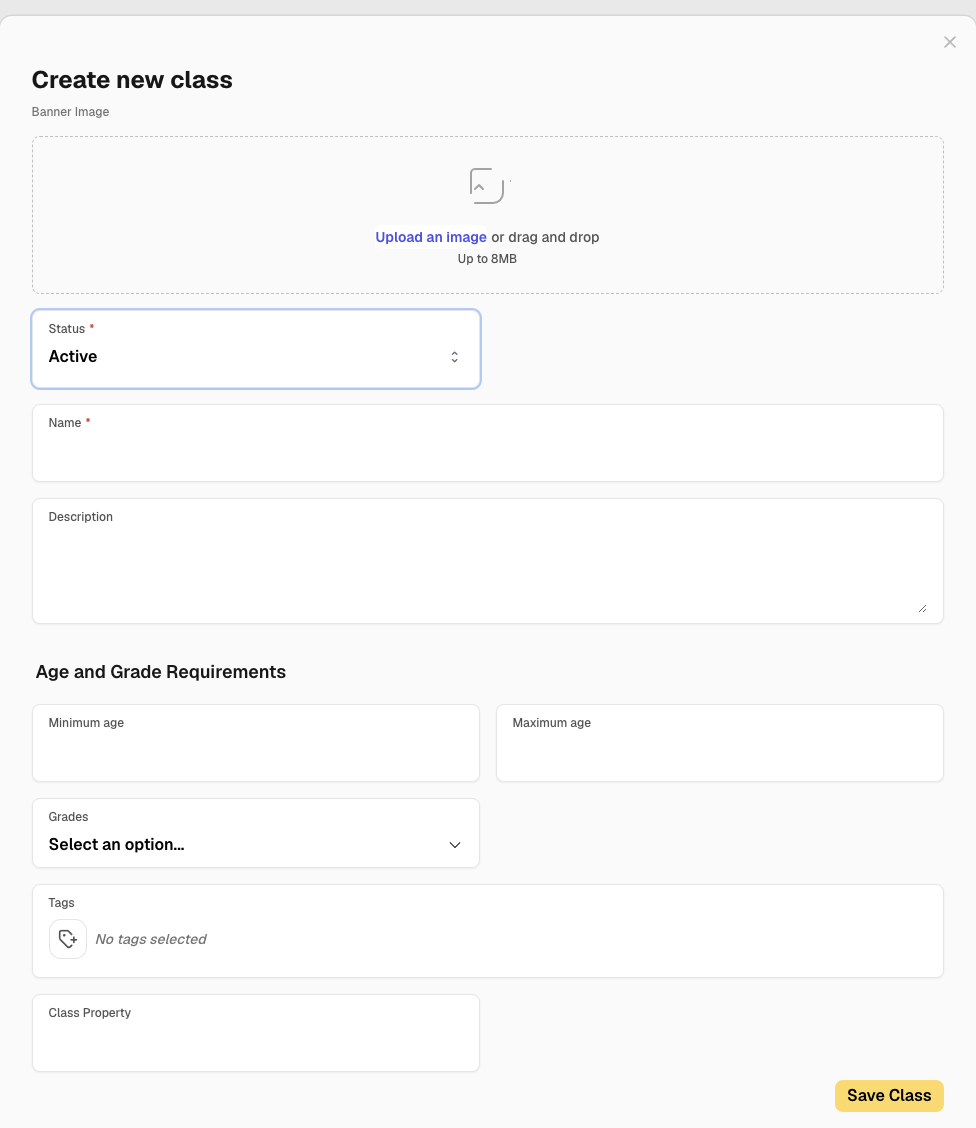
- From the “Classes” tab, click the green + New Class button in the upper right. That opens the Create new class dialog.
-
Provide as much information as you can about your class. This will help parents filter and find your classes on the registration page.
-
Click Save Class at the bottom of the dialog. The new class appears on the Classes page and can be opened to add sections. To discard without saving, close the dialog with the X (or press Escape).
Edit a Class
- From the “Classes” tab, click on the class you want to edit.
- Click the blue “Edit” button in the top right corner.
- Edit the fields you would like to change. You can reference the options in the table above.
- Click “Save Class” when you are done, or press “Cancel” in the top right corner.